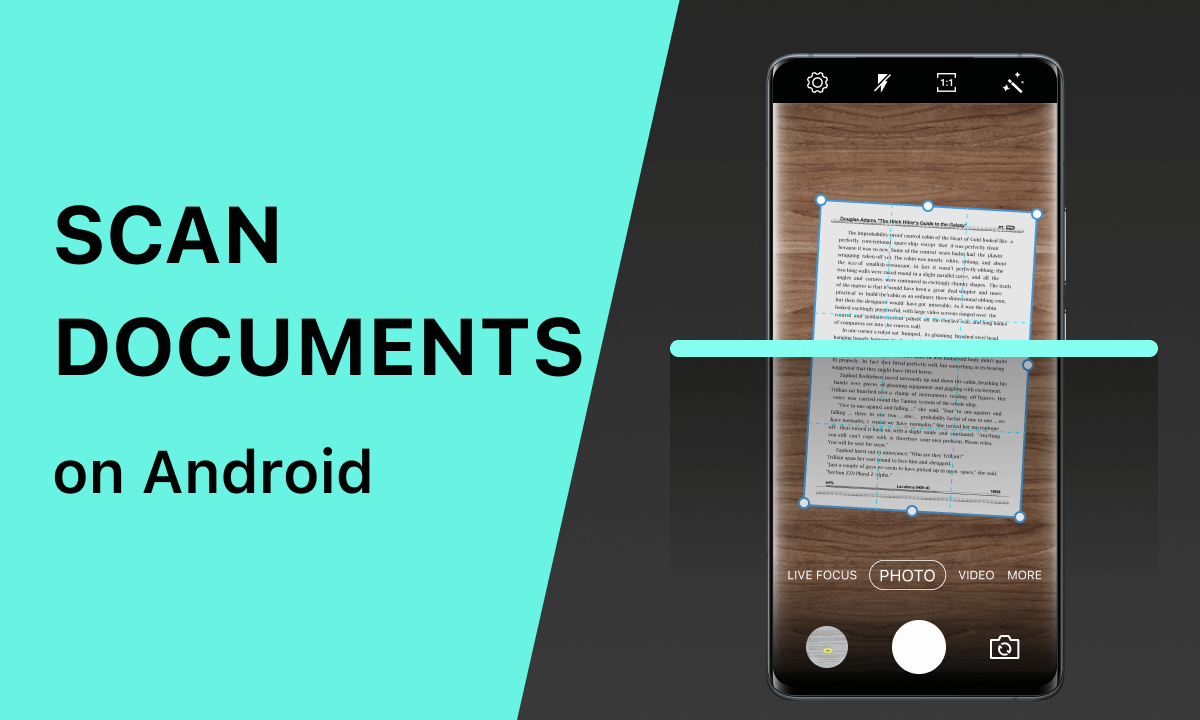
How to Scan Documents on Android with 3 Easy Methods

Summary :
In this comprehensive guide, you’ll learn how to efficiently scan documents on your Android device using a variety of apps and methods. Make document scanning a breeze.
Table of Contents
How to Scan Documents on Android
Scanning documents has become an essential task in many of our lives and work. But now it can be easily done using Android phones. In this article, we will explore three effective ways to scan and edit documents using Google Drive, Microsoft Lens, and Adobe Scan along with their detailed steps.
These tools provide flexibility and convenience for all your scanning needs on Android devices.
How to Scan Documents on Android Using Google Drive
Google Drive is not only the best cloud storage tool, but it can also be used as a document scanning app to create and share your work online and manage documents easily.
It provides a straightforward and efficient solution for scanning documents. It’s ideal for those looking for a fast and efficient mobile document scanning option.
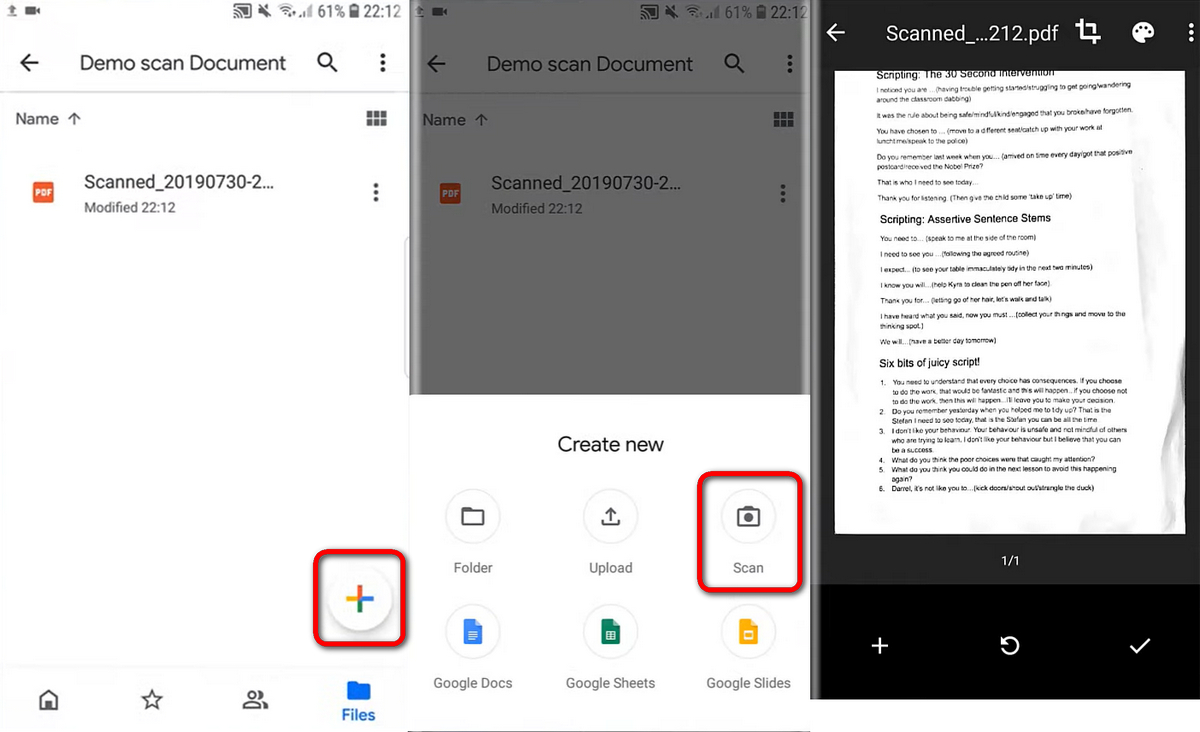
Step 1. Download and open Google Drive from Google Play.
Step 2. Click the “+” icon > Select “Scan”. And allow the app to access your camera.
Scan PDF on Android Using Google Drive
Step 3. Place the document to be scanned in the appropriate location and click the capture button in the middle of the screen to scan the current page.
Scan Documents in Google Drive
Step 4. Click “Crop” to adjust the scanning area. If you want to take another shot of the current page, click the refresh icon in the middle. If you want to scan more pages, click the “+” on the left.
Edit Scanned Pictures
Step 5. After completing the scan, click “√” on the right, name the file, select the save location and click “Save”.
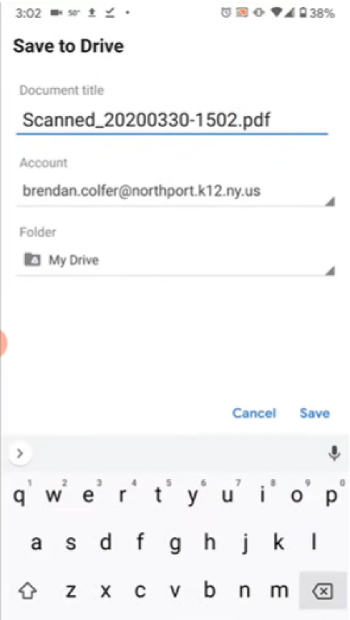
Save Document
How to Scan Documents on Android Using Microsoft Lens
Microsoft Lens is a free app from Microsoft that allows users to easily scan receipts, business cards, notes, photos, and other types of documents from their mobile devices.
At the same time, Microsoft Lens also utilizes advanced optical character recognition (OCR) technology, allowing users to edit and copy text in scanned documents as needed. It is ideal for users who want to scan and edit documents.
Step 1. Search and download Microsoft Lens in Google Play.
Step 2. Open Lens, slide the lower menu bar to the left, and select “Documents”.
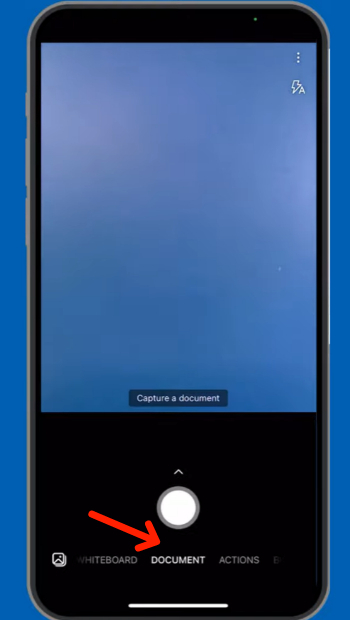
Select Document Mode
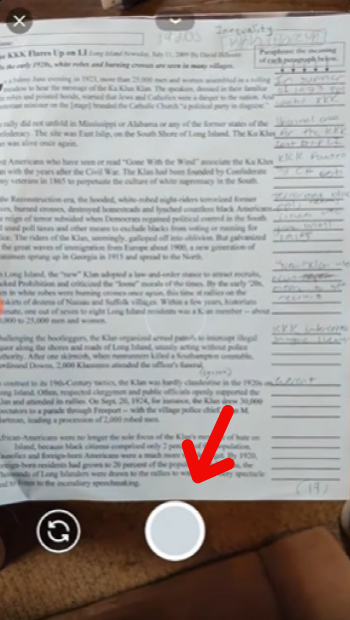
Step 3. Place the document correctly into the viewfinder and click the capture button to take a photo.
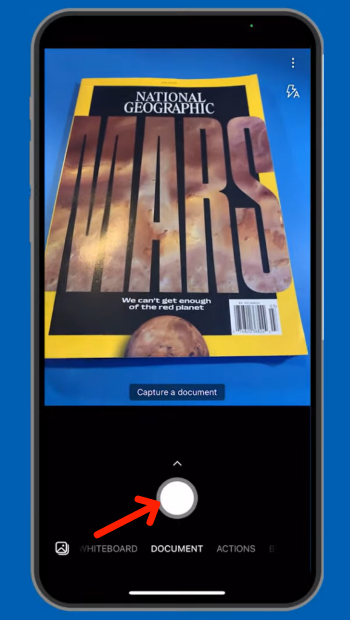
Scan Documents in Microsoft Lens
Step 4. Move the four corners of the white lines to crop the scanned image. Click “Confirm” in the lower right corner to view and edit the scanned document. You can crop, add filters, and more advanced options. If you need to add multiple documents, just click “Add” on the left side of the menu bar below.

Edit Scanned Documents
Step 5. After editing is complete, click “Done” in the lower right corner to save and share your scanned document.
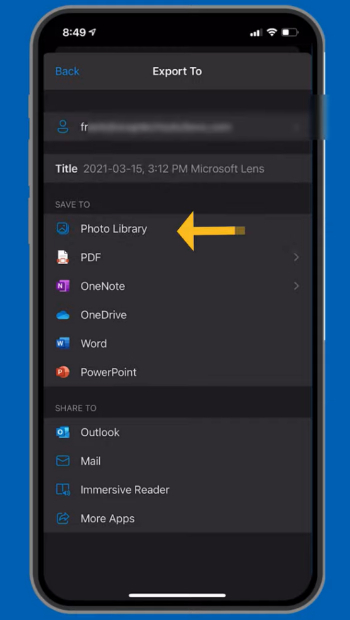
Save Document in Microsoft Lens
How to Scan Documents on Android Using Adobe Scan
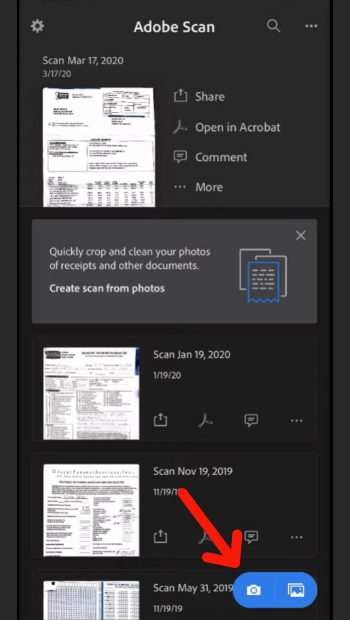
Adobe Scan turns your mobile device into a free, all-in-one scanner. Allows you to scan whiteboards, books, documents, business cards, and more into digital documents. At the same time, it also has many attack functions, allowing users to export files, merge files, and even compress scanned PDFs.
Adobe Scan is the best choice for document creation, saving, and organization.
Step 1. Search and download Adobe Scan in Google Play.
Step 2. Open Adobe Scan and tap the “Camera” icon in the lower right corner to open your mobile device’s camera for scanning.
Go to Camera
Step 3. Place the document correctly into the viewfinder, Adobe Scan will automatically lock and capture the document image. To retake the current page click “Retake”. To capture more pages please click “Continue”.
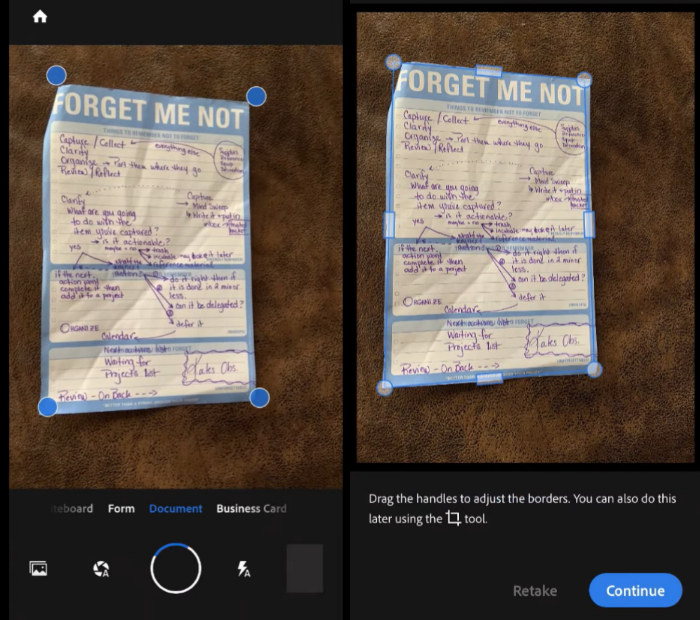
Scan Documents in Adobe
Step 4. Click on the scanned image to enter editing mode. Change file names, crop, adjust order, etc.

Edit Scanned Images in Adobe
Step 5. After editing is completed, click “Save PDF” in the upper right corner to save and share your scanned document.
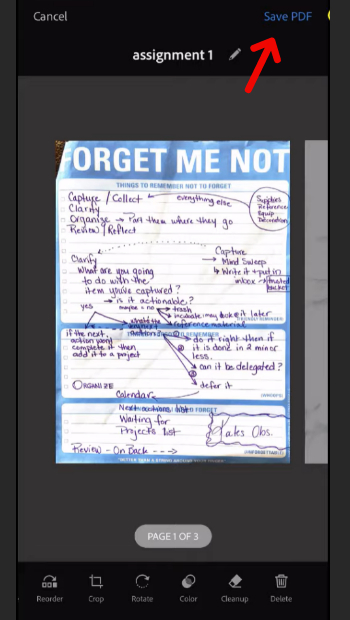
Save Documents in Adobe
FAQs
How to Scan Multiple Pages Into One PDF on Android?
You can scan multiple pages using all the methods mentioned in this article. For example, when using Adobe Scan, simply click “Add”/”Continue” after scanning the current page to scan multipage PDF files into one PDF.
How to Check Scanned Files on Android?
Scanned files are usually stored in the application used for scanning, such as Google Drive, Microsoft Lens, or Adobe Scan. Just go to the output locations of these apps to check your files.
How to Scan Documents on Samsung Galaxy?
Download and open Adobe Scan on your Samsung Galaxy, and place the document correctly in the viewfinder. Adobe Scan will automatically scan the document for you. Click “Save PDF” to save the scanned document to your mobile device.
How to Scan Documents on Google Pixel?
Download and open Google Drive on Google Pixel, click the “+” in the lower right corner, and select “Scan”. Place the document correctly in the viewfinder and click the capture button to scan your document. Finally, click “Save” to save the scanned document to the cloud.
Conclusion
In summary, the method you choose to scan documents on Android depends on your specific needs.
Google Drive is fast and easy, Microsoft Lens is great for documents that need editing, and Adobe Scan offers excellent scan quality. With the help of these tools, you can make scanning documents on Android a simple and efficient task.