3 Simple Ways to Resize a PDF Image without Quality Loss

Summary :
This post provides a comprehensive overview of how to resize a PDF image, offering methods suitable for Windows and Mac users.
Table of Contents

How to Resize a PDF Image
Sometimes, you might have to resize images in a PDF for printing. You might need to make them bigger to fill a whole page or smaller to fit in a certain spot.
While resizing a PDF image can indeed result in some loss of quality, there are methods and tools available that can help minimize this loss.
How to Resize an Image on a PDF File for Free Using PDFgear
As a free PDF image resizer, PDFgear enables you to make a picture smaller or larger in a PDF. Additionally, it offers features to rotate, delete, replace, and extract PDF images with just a few clicks. For scanned PDF images, the built-in OCR feature can extract text.
What makes PDFgear better is that it is now free of charge, and users can access all its features without limitation. Follow these steps to use PDFgear to enlarge images in a PDF for printing:
Easily resize, crop, and edit images within PDFs for better document printing.
Step 1. Launch PDFgear and use the “Open File” button to select and open the PDF document containing the image you wish to resize.
Open a PDF in PDFgear to Resize Image
Step 2. To freely change the aspect ratio, click on the image to select it.
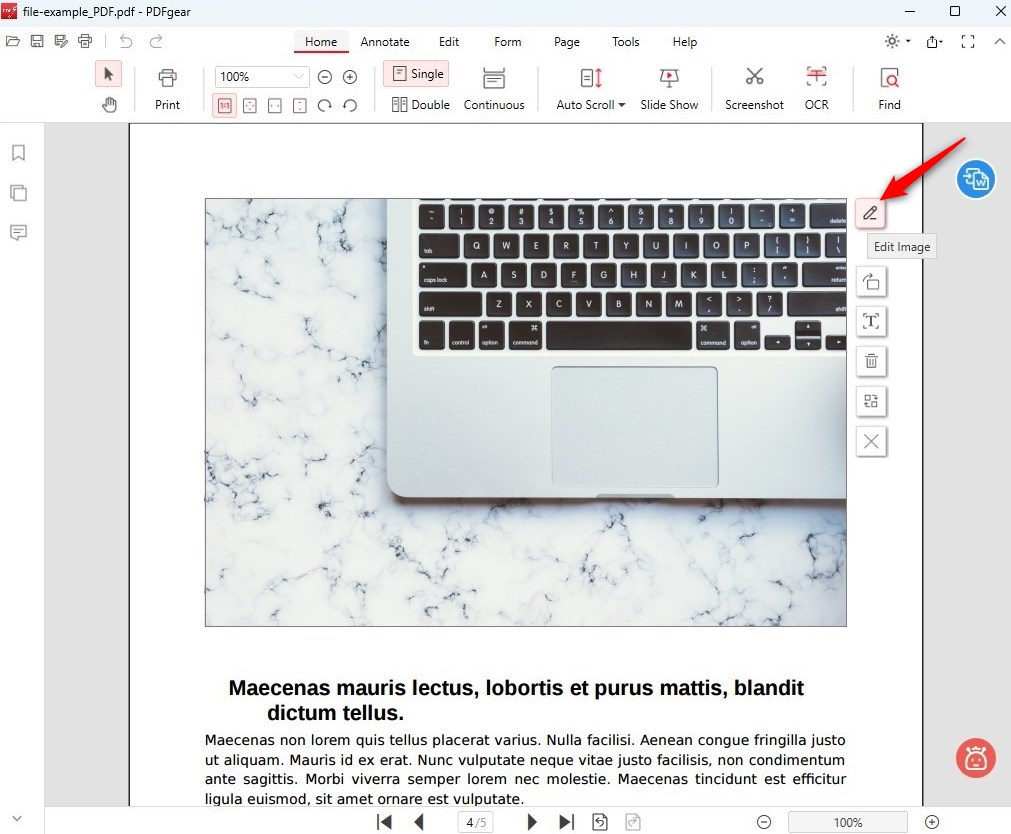
Edit Image Option in PDFgear
An “Edit Image” icon will appear in the corners around the selected image. It will show you lots of options, including save, rotate, OCR, replace, and delete image from PDF.
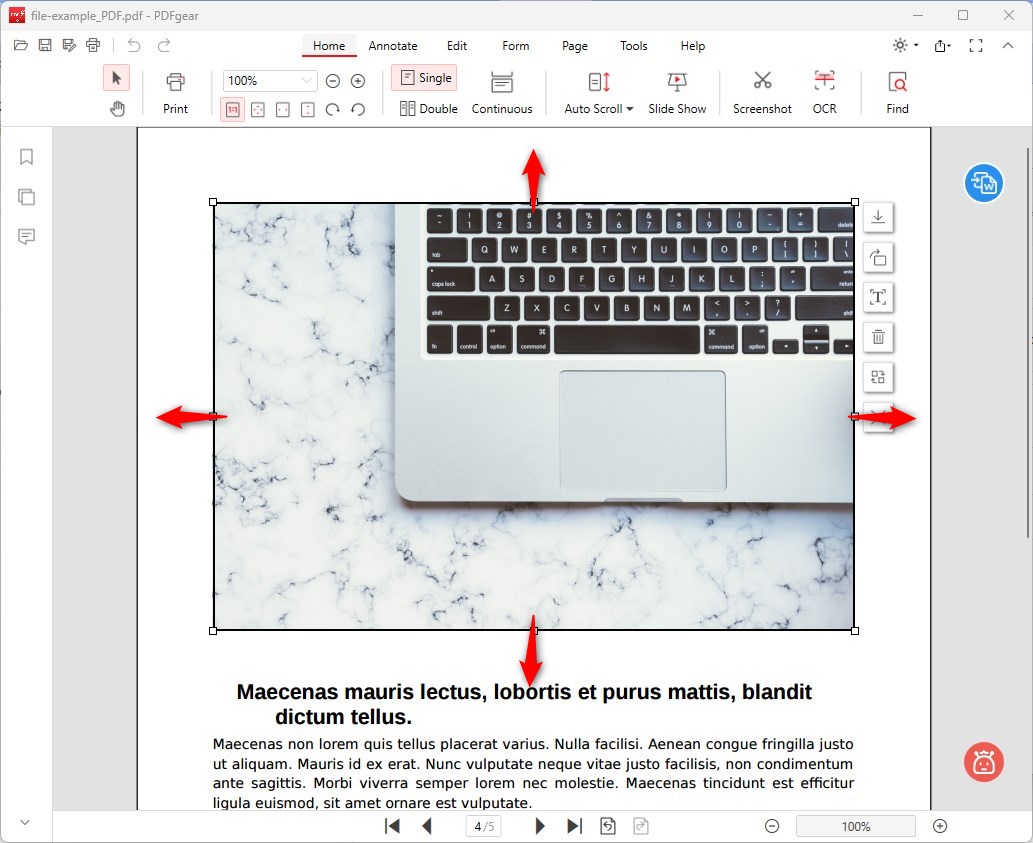
Step 3. You can then click and drag these dots to adjust the height and length of the image. It’s important to do this carefully to avoid distorting the image quality.
Resize PDF Image in PDF Using PDFgear
Step 4. To retain the original aspect ratio while resizing, select the image and hold the “Shift” key while adjusting the size.
This method helps preserve the quality of the image and ensures that the resized image maintains its original proportions.
How to Resize Image within PDF Using Adobe Acrobat
Adobe Acrobat is indeed a good tool for resizing PDF images, especially for users who require high-quality output. Beyond simple resizing, Adobe Acrobat offers a range of image editing features, including replacing, rotating, and cropping images within a PDF.
However, it’s important to note that Adobe Acrobat is a premium software. You need to subscribe to use all its editing features. Here are the steps to resize an image inside a PDF using Adobe Acrobat:
Step 1. Start by launching Adobe Acrobat and opening the PDF file containing the image you wish to resize.
Step 2. Click on the “Tools” option in the top toolbar, then select “Edit PDF” > “Edit.”

Access Editing Tools in Adobe Acrobat
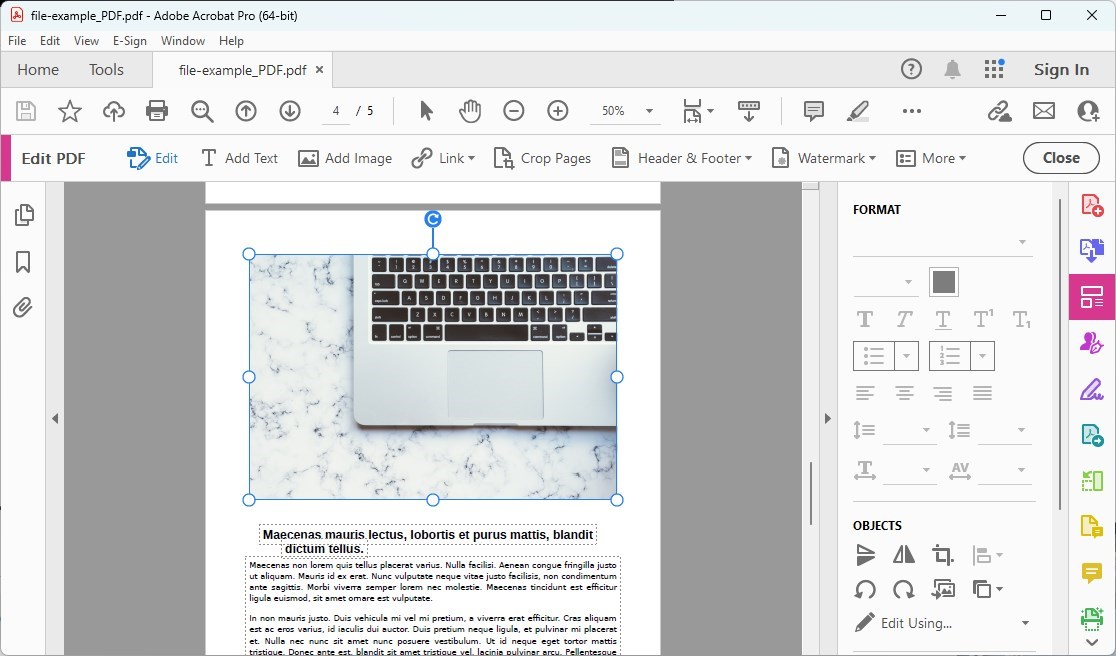
Step 3. Hover your cursor over the image you want to edit, then click and drag the corners to resize the image. To maintain the image’s original aspect ratio, hold the Shift key while dragging.
Resize a PDF Image Using Acrobat
Beyond resizing, you can rotate, flip, crop, or edit PDF image text. These options are accessible under “Tools” > “Edit PDF” > “Edit,” where you can select your image(s) and choose from various tools under “Objects.”
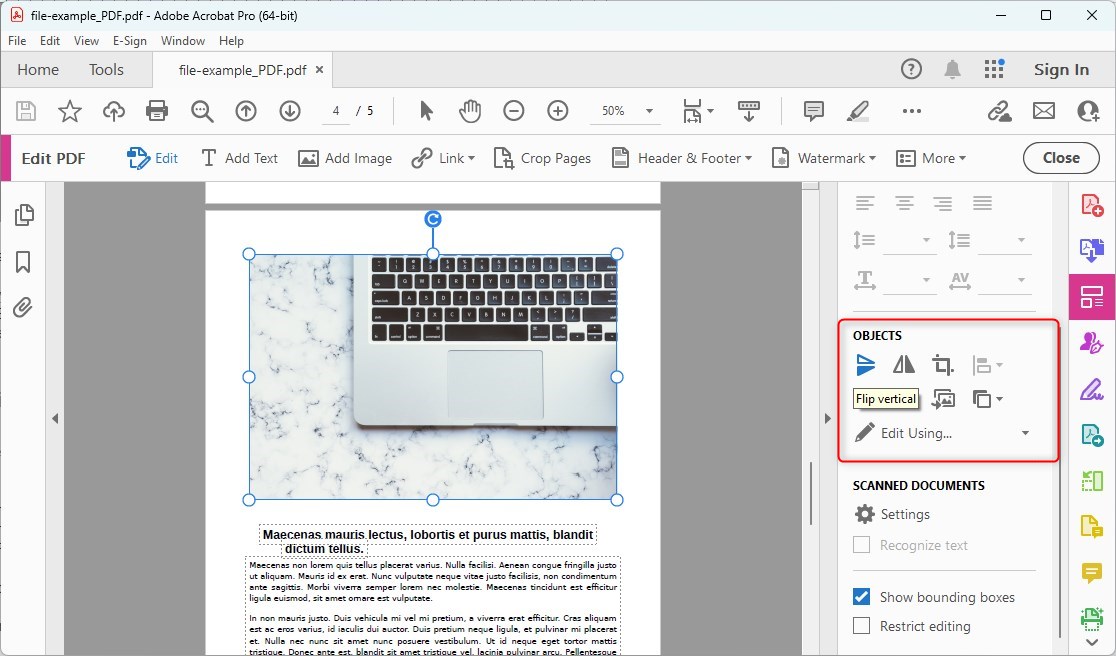
Edit Object in a PDF Using Acrobat
How to Resize an Image in a PDF Using Preview on Mac
Preview supports resizing images within PDF documents, but with a caveat. Preview directly allows users to resize standalone image files (like JPEGs, PNGs, etc.).
When it comes to PDFs, resizing an image specifically within a PDF document might require a different approach, as Preview treats PDFs as documents rather than a collection of images. However, you can extract images from a PDF, resize them, and then reinsert them into the document using Preview.
Step 1. Simply double-click the image file, and it should open in Preview by default.
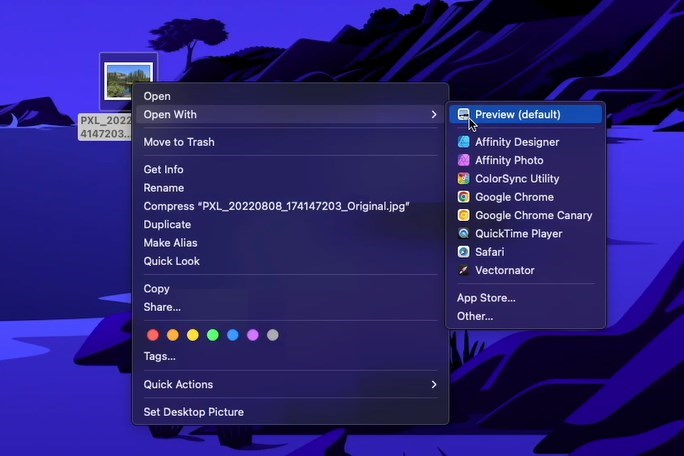
Open a PDF Image with Preview
Step 2. Click on the “Tools” menu in the top menu bar, then select “Adjust Size” to open the resize window.

Access the Resize Tool on Mac Preview
Step 3. In the resize window, you can specify new values for the width and height, adjust the resolution, or scale the image by a percentage.
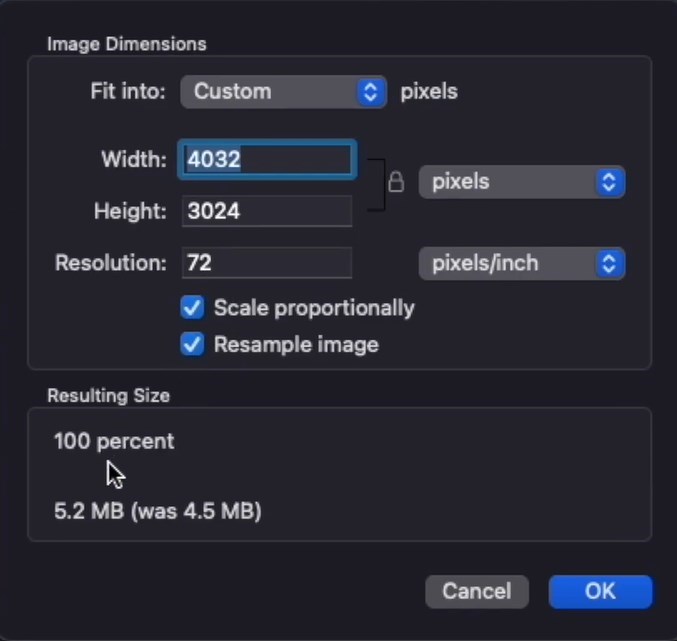
Adjust the Image Size with Mac Preview
Preview also offers the option to maintain the image’s original aspect ratio to prevent distortion.
Step 4. Once you’ve adjusted the size to your liking, save the image.
You can also use the “Export” option to save a new version of the image, allowing you to keep the original file unchanged.
Conclusion
Resizing an image within a PDF document is a common task that can be approached in several ways, depending on the tools available.
Adobe Acrobat is a good choice but you need to pay for it. Preview on macOS only has basic editing tools. Tools like PDFgear are a good option because they have advanced features, are easy to use, and are free.